Zendiwiki: Manual of Style: Images
This guide explains how to use and insert images in Zendiwiki articles. It is strongly recommended to follow these rules, especially for articles in the guides namespace.
Legal considerations when using images and media
Overriding rule: The author is responsible for the clarification, compliance and documentation of all legal aspects of the image files or other media uploaded by him/her.
As a rule of thumb, only media that can be “legally made available to the whole world”, so to speak, i.e. for which the public at least has reading rights, may be used. This is because reading access to the content in the publication areas of Zendiwiki is not restricted.
Note: This basic rule applies not only to copyright, but also to all other legal aspects of the publication of image material. This includes, in particular, the right to privacy (right to one's own image), data protection, protection of minors, ethical aspects and so on.
Violation of such rules and laws can have serious consequences, not least because of the global reach of content published online, providing easy and even automatable accessibility to complainants worldwide.
Copyright and licensing
Zendiwiki rules
A license that allows one to publish an image does not automatically imply that others may then continue to use that image for their purposes. Reuse and other terms are defined by the respective copyright and licensing notes, which must be specified.
For this purpose Zendiwiki requires the respective copyright and license information to be provided directly in the document (the Zendiwiki page) on which the image or media is presented (embedded or linked).
For complete documentation and easier verification, the following information must be provided on Zendiwiki for each image or media:
- Authorship and/or source.
- Name/type of license with reference to the respective provisions (e.g. a web link).
- For non-free licenses or agreements, the exact information as requested by the rights owner.
In the spirit of “best practices for attribution”, on Zendiwiki this information is required even if the respective license itself does not expressly provide for it.
Licencing categories
As a first orientation for authors, the following types of licences can be roughly distinguished, which play a role for publication on the Zendiwiki.
- Own work: The Zendiwiki author himself owns all rights to the image. This is usually the case if it was created by him or her. Of course, all legal requirements regarding the depicted items must still be observed. In the case of screenshots and artwork, for example, their copyright, for people the “right to one's own image”, etc.
- Creative commons: The copyright holder has released his or her image under one of the creative commons licence types. Creative commons does not mean copyright-free or free of terms of restrictions. See also the mandatory license conditions for own works on this page below.
- Specifically granted rights of use: A typical case is screenshots of software products with special permission from the manufacturing company. Permission to use such product screenshots in self-written manuals is quite common but often subject to certain conditions. For example, it is prohibited to make graphic changes in the screenshot itself (e.g. to add markings). Sometimes you can find manufacturer's guidelines already published on the web. Since such regulations may be subject to change by the manufacturer, it is up to the respective Zendiwiki author to monitor this.
- Other “free” licenses: Many image databases offer “free images”, but their use is restricted in certain respects by their own license conditions. These can, for example, contain very specific formats for the assignment of author or source. If such images are used, then it is up to the article author to check the license conditions in detail, and to ensure (permanent) compliance with the special regulations.
Mandatory license conditions for own works
Everything published in ZenDi wiki is published under :https://creativecommons.org/licenses/by-sa/4.0/deed.en
 :
:
Inserting images
To insert a new image into a Zendiwiki page, three steps are required:
- Pre-edit the image file with graphics software if necessary.
- Upload the image file to Zendiwiki.
- Embed the image in the DokuWiki text of the page.
(Pre-)editing the image file
The use of fixed widths for images in pixels is controversial. See the argumentation on https://en.wikipedia.org/wiki/Wikipedia:Manual_of_Style/Images#Size. In addition, this creates a dependency on the current technical status quo of screen resolutions.
For Zendiwiki it is strongly recommended to use only four image sizes: Width 360, 540, 720 or 1080 pixels.1) To ensure optimal functionality, only image files that are already in these formats should be uploaded to the wiki. The recommended format for image files is PNG.
You can achieve this with your favourite image editor software, such as GIMPFOSS.
As an alternative, the ImageMagick software package FOSS for image processing contains the command line tool convert. With it it is possible to convert various properties of image files efficiently and accurately, even in one pass.
Example 1:
convert -resize 540\> waterfall-original-big.jpg waterfall-540.png
This command does the following:
- Create a new image file
waterfall-540.pngin the current directory. - Convert the file from the
.jpgimage format to the.pngformat. - Shrink the image to the width of 540 pixels.
\>means: do not enlarge a smaller image. (With enlarging, the image quality tends to deteriorate.) - Preserve the aspect ratio. ImageMagick by default keeps the with-to-height proportion of an image.
Example 2:
convert “*.jpg[360x>]” -set filename:base “%[basename]” “images-360/%[filename:base]_w360p.png”
Does the following:
*.jpg: Convert all image files in the current directory, ending with.jpg.[360x>]: Shrink the images to 360 pixels width. Do not enlarge smaller images (achieved by the>).- Convert the image format to
png. - Keep the filenames (
%[basename]), each extended by the string_w360p. - Store all converted files in the sub directory
images-360/(must exist).
Uploading image files
Image names
The names of images and all other files uploaded to Zendiwiki should conform to the following recommendations.
Naming conventions (syntactic)
Follow the same naming conventions for images and media as you would for other files, wiki pages and wiki namespaces themselves:
Avoid the spaces and use hyphens. You should also not use underscores. Stick to the lower case Latin letters from “a” to “z” and the digits “0” to “9”. (See also naming conventions.)
Descriptive names (semantic)
The title should briefly and succinctly outline the content. In other words: Combine essential keywords to build the image name.
Support structuring and indexing
If some pictures belong together thematically, you can use a special, understandable and meaningful keyword repeatedly for all these pictures at the beginning of the name. Think of this keyword as a kind of “tagging”.
In contrast, you can also use a cryptic marker at the very beginning of the name to make a classification. This would also make the images appear in a sorted list in a row.
These approaches can be combined.
Examples:
flowers-roses-on-international-garden-exhibition-berlin-2022.png, flowers-enzian-snowy-mountaintop.png
Here “flowers” is used like a tag or category.
mbh1-file-upload-dialogue.png, mbh1-adding-new-file-type.png
.
The cryptic tag “mbh1” ,for example, marks all images used in the wiki page “Moodle basics handout part 1”.
The “meaning” (if any) of such a “cryptic tag” need not be known to the reader. Such a mark should of course be as short as possible and should be unique among all media files.
The application of such tags can be useful because a media folder contains the images for all wiki pages of the same namespace. (see under Image upload location).
Legally proper
When naming image files, just as with all other visible naming of elements in the wiki, all legal requirements must be met. Always critical, for example, is the use of product, company and brand names. Of course, a correct file name cannot “cure” illegal image content.
Upload location and procedure
A simple and direct way to upload image files is directly from the wiki page editor. With this method, the media manager opens and offers the namespace of the currently edited page as the destination for the upload.
Always place your uploaded files in this default directory offered in the media manager, which belongs to the current namespace of the edited page.
Example:
Your wiki page introduction is located in a sub namespace all-my-books:non-fiction:
:all-my-books:non-fiction:introduction
If you launch the media manager from the editor while you are editing the page introduction, the default upload folder in the media manager is as follows:
:all-my-books:non-fiction
Step-by-step instructions (click on each step):
Step 1: Open the media manager with the editor.

When editing a wiki page with the editor, you can directly insert an image at the cursor position.
Just click on the image button  of the toolbar. This will open the media manager in a pop-up window.
Step 2: Select the file(s) for upload.

After clicking the Select files… button in the media manager (see the screenshot of step 3), the standard file selection dialog window of the browser opens. In the example the window is labeled File Upload.
This window looks slightly different on each operating system. However, the basic steps for file upload are always the same:
- Go to the directory on your computer that contains the image file(s).
- Select one or more files by marking them with a mouse click.
- You can also select multiple files. To do this, hold down the
<ctrl>key of your keyboard. - After making your selection, click on the
Openbutton. (In this example, on your computer the name may be different).
Step 3: Upload to the correct location.

- Complete the upload by clicking the
Uploadbutton. - Make sure the upload location is correct. In this example, it is
:en:blueprintsas you can see in big letters above. - Normally you do not need to change the upload location provided. The media directory shall always match the namespace where the currently edited wiki page is located.
Step 4: Finish the upload.

- After step 3 the image file name(s) appears inside the media manager.
- Click on
Done.
Step 5: Select the uploaded image to insert.

- Now you can click on the image preview at the bottom of the media manager to insert the image in the editor.
Step 6: Adjust image settings.

- After clicking on the image preview, a window will open where you can adjust some image or link settings.
- If your image has the correct size, as recommended, then you should select the
OunderImage size. What happens if you don't do that, you will see in the next step.
Step 7: Finish editing.

Finish editing the image link in the wiki text.
- In the example here, the resize parameter
?400should be removed. The image already has a recommended width of 540 pixels. - You should also add a title after the
|. This is displayed as a tooltip when the mouse pointer is moved over the image.
Step 8: Embedded image after closing the editor.

Image sizes
Embedding images
Images can be embedded in DokuWiki text as other media. For details see Image and Media Handling on the DokuWiki website. Images used in Zendiwiki articles should not normally be right or left aligned (see Zendiwiki: Manual of Style § Images). Reasonable exceptions are, of course, fine.
Floating text around images is not recommended. Try it with the example right below: Pull your browser window narrower. Do it in small steps to observe the unsightly effects in the example here:

Lorem ipsum dolor sit amet, consectetur adipiscing elit, sed do eiusmod tempor incididunt ut labore et dolore magna aliqua. Consequat mauris nunc congue nisi vitae suscipit tellus mauris a. Morbi tempus iaculis urna id volutpat lacus laoreet non curabitur. Mi eget mauris pharetra et ultrices neque ornare. Tellus id interdum velit laoreet. Quis eleifend quam adipiscing vitae proin sagittis nisl rhoncus mattis. Lorem mollis aliquam ut porttitor. Proin nibh nisl condimentum id venenatis a condimentum vitae. Felis imperdiet proin fermentum leo. Semper quis lectus nulla at volutpat diam ut venenatis. Et ligula ullamcorper malesuada proin libero nunc consequat interdum. Vitae nunc sed velit dignissim sodales. Natoque penatibus et magnis dis parturient. Massa placerat duis ultricies lacus sed turpis tincidunt id aliquet. Non enim praesent elementum facilisis leo vel. Adipiscing vitae proin sagittis nisl. Nisi scelerisque eu ultrices vitae auctor eu augue ut.
So do not use the DokuWiki syntax for left or right alignment of images: whitespaces on the left or the right side of the image markup. Don't do this:
{{ my-image.png}}
{{my-image.png }}
What you can or should do:
{{my-image.png}}
{{ my-image.png }}
(First line: no whitespaces, image left bound without floating text. Second line: whitespaces on both sides, image centered.)
Embedding images with closely associated text
Printed instruction manuals and handbooks often contain(ed) images with text annotations or graphic markings. For a while, one could have the impression that such visualizations in manuals stood as the silver bullet for easy understanding. This has tended to change with modern media – therefore the contain(ed) –, as increasingly smartphones and tablets in portrait format and with narrower screens determine reading behaviour.
With the Zendiwiki we try to find a middle way. We have implemented a solution to on the one hand bind a text block closely to an image, on the other hand the display is responsive, i.e. it can be displayed on wide as well as on narrow screens. The solution includes a customized technical component (an extension of the WRAP plugin) in conjunction with a design proposal and other DokuWiki plugins.
One of the main goals is to make it as easy as possible for authors to use. That is why exactly four image sizes are supported for text block mapping: Images with a width of 360, 540, 720 and 1080 pixels.
There are also two other special formats for the label section: Lists with circled numbers and borders around text blocks.
Medium sized images (width 540 pixels)
Example with caption:
(Change the size of the browser window, especially towards portrait.)
Lorem ipsum dolor sit amet, consectetur adipiscing elit, sed do eiusmod tempor incididunt ut labore et dolore magna aliqua. Consequat mauris nunc congue nisi vitae suscipit tellus mauris a. Morbi tempus iaculis urna id volutpat lacus laoreet non curabitur. Mi eget mauris pharetra et ultrices neque ornare. Tellus id interdum velit laoreet. Quis eleifend quam adipiscing vitae proin sagittis nisl rhoncus mattis. Lorem mollis aliquam ut porttitor. Proin nibh nisl condimentum id venenatis a condimentum vitae. Felis imperdiet proin fermentum leo. Semper quis lectus nulla at volutpat diam ut venenatis. Et ligula ullamcorper malesuada proin libero nunc consequat interdum. Vitae nunc sed velit dignissim sodales. Natoque penatibus et magnis dis parturient. Massa placerat duis ultricies lacus sed turpis tincidunt id aliquet. Non enim praesent elementum facilisis leo vel. Adipiscing vitae proin sagittis nisl. Nisi scelerisque eu ultrices vitae auctor eu augue ut.
- First item bullet list.
- Second item bullet list.
- Third item bullet list.
Lorem ipsum dolor sit amet, consectetur adipiscing elit, sed do eiusmod tempor incididunt ut labore et dolore magna aliqua. Consequat mauris nunc congue nisi vitae suscipit tellus mauris a. Morbi tempus iaculis urna id volutpat lacus laoreet non curabitur.
DokuWiki Syntax using <WRAP labeled-image-medium>:
<WRAP labeled-image-medium>

<figure>

{{waterfall-540.png}}

<caption>This text is the caption [...] </caption>

</figure>

<WRAP>

Lorem ipsum dolor sit amet, consectetur adipiscing elit,
sed do eiusmod tempor incididunt ut labore et dolore
[...]
facilisis leo vel. Adipiscing vitae proin sagittis nisl.
Nisi scelerisque eu ultrices vitae auctor eu augue ut.

  * First item bullet list.
  * Second item bullet list.
  * Third item bullet list.

Lorem ipsum dolor sit amet, [...]

</WRAP>
</WRAP>
Example without caption:
(Change the size of the browser window, especially towards portrait.)
Lorem ipsum dolor sit amet, consectetur adipiscing elit, sed do eiusmod tempor incididunt ut labore et dolore magna aliqua. Consequat mauris nunc congue nisi vitae suscipit tellus mauris a. Morbi tempus iaculis urna id volutpat lacus laoreet non curabitur. Mi eget mauris pharetra et ultrices neque ornare. Tellus id interdum velit laoreet. Quis eleifend quam adipiscing vitae proin sagittis nisl rhoncus mattis. Lorem mollis aliquam ut porttitor. Proin nibh nisl condimentum id venenatis a condimentum vitae. Felis imperdiet proin fermentum leo. Semper quis lectus nulla at volutpat diam ut venenatis. Et ligula ullamcorper malesuada proin libero nunc consequat interdum. Vitae nunc sed velit dignissim sodales. Natoque penatibus et magnis dis parturient. Massa placerat duis ultricies lacus sed turpis tincidunt id aliquet. Non enim praesent elementum facilisis leo vel. Adipiscing vitae proin sagittis nisl. Nisi scelerisque eu ultrices vitae auctor eu augue ut.
- First item bullet list.
- Second item bullet list.
- Third item bullet list.
Lorem ipsum dolor sit amet, consectetur adipiscing elit, sed do eiusmod tempor incididunt ut labore et dolore magna aliqua. Consequat mauris nunc congue nisi vitae suscipit tellus mauris a. Morbi tempus iaculis urna id volutpat lacus laoreet non curabitur.
Dokuwiki syntax even simpler without caption:
<WRAP labeled-image-medium>

{{waterfall-540.jpg}}

<WRAP>

Lorem ipsum dolor sit amet, consectetur adipiscing elit,
sed do eiusmod tempor incididunt ut labore et dolore
[...]
facilisis leo vel. Adipiscing vitae proin sagittis nisl.
Nisi scelerisque eu ultrices vitae auctor eu augue ut.

  * First item bullet list.
  * Second item bullet list.
  * Third item bullet list.

Lorem ipsum dolor sit amet, [...]

</WRAP>
</WRAP>
Small images (width 360 pixels)
Example: Small image with much text
(Change the size of the browser window, especially towards portrait.)

Lorem ipsum dolor sit amet, consectetur adipiscing elit, sed do eiusmod tempor incididunt ut labore et dolore magna aliqua. Consequat mauris nunc congue nisi vitae suscipit tellus mauris a. Morbi tempus iaculis urna id volutpat lacus laoreet non curabitur. Mi eget mauris pharetra et ultrices neque ornare. Tellus id interdum velit laoreet. Quis eleifend quam adipiscing vitae proin sagittis nisl rhoncus mattis. Lorem mollis aliquam ut porttitor. Proin nibh nisl condimentum id venenatis a condimentum vitae. Felis imperdiet proin fermentum leo. Semper quis lectus nulla at volutpat diam ut venenatis. Et ligula ullamcorper malesuada proin libero nunc consequat interdum. Vitae nunc sed velit dignissim sodales. Natoque penatibus et magnis dis parturient. Massa placerat duis ultricies lacus sed turpis tincidunt id aliquet. Non enim praesent elementum facilisis leo vel. Adipiscing vitae proin sagittis nisl. Nisi scelerisque eu ultrices vitae auctor eu augue ut.
- First item bullet list.
- Second item bullet list.
- Third item bullet list.
Lorem ipsum dolor sit amet, consectetur adipiscing elit, sed do eiusmod tempor incididunt ut labore et dolore magna aliqua. Consequat mauris nunc congue nisi vitae suscipit tellus mauris a. Morbi tempus iaculis urna id volutpat lacus laoreet non curabitur. Mi eget mauris pharetra et ultrices neque ornare. Tellus id interdum velit laoreet. Quis eleifend quam adipiscing vitae proin sagittis nisl rhoncus mattis. Lorem mollis aliquam ut porttitor. Proin nibh nisl condimentum id venenatis a condimentum vitae. Felis imperdiet proin fermentum leo. Semper quis lectus nulla at volutpat diam ut venenatis. Et ligula ullamcorper malesuada proin libero nunc consequat interdum. Vitae nunc sed velit dignissim sodales. Natoque penatibus et magnis dis parturient. Massa placerat duis ultricies lacus sed turpis tincidunt id aliquet. Non enim praesent elementum facilisis leo vel. Adipiscing vitae proin sagittis nisl. Nisi scelerisque eu ultrices vitae auctor eu augue ut.
- First item of the list.
- Second item of the list.
- Third item of the list.
Example: Small image with little text
(Change the size of the browser window, especially towards portrait.)
Lorem ipsum dolor sit amet.
- First item of the list. Lorem ipsum dolor sit amet, consectetur adipiscing elit, sed do eiusmod tempor incididunt ut labore et dolore magna aliqua. Consequat mauris nunc congue nisi vitae suscipit tellus mauris a. Morbi tempus iaculis urna id volutpat lacus laoreet non curabitur. Mi eget mauris pharetra et ultrices neque ornare. Tellus id interdum velit laoreet. Quis eleifend quam adipiscing vitae proin sagittis nisl rhoncus mattis. Lorem mollis aliquam ut porttitor. Proin nibh nisl condimentum id venenatis a condimentum vitae.
- Second item of the list.
- Third item of the list.
DokuWiki Syntax using <WRAP labeled-image-small>:
<WRAP labeled-image-small>

{{waterfall-360.png}}

<WRAP>

Lorem ipsum dolor sit amet.

  - First item of the list. [...]
  - Second item of the list.
  - Third item of the list.

</WRAP>
</WRAP>
Large sized images (width 720 pixels)
Example:
(Change the size of the browser window, especially towards portrait.)
Lorem ipsum dolor sit amet, consectetur adipiscing elit, sed do eiusmod tempor incididunt ut labore et dolore magna aliqua. Consequat mauris nunc congue nisi vitae suscipit tellus mauris a. Morbi tempus iaculis urna id volutpat lacus laoreet non curabitur. Mi eget mauris pharetra et ultrices neque ornare. Tellus id interdum velit laoreet. Quis eleifend quam adipiscing vitae proin sagittis nisl rhoncus mattis. Lorem mollis aliquam ut porttitor. Proin nibh nisl condimentum id venenatis a condimentum vitae. Felis imperdiet proin fermentum leo. Semper quis lectus nulla at volutpat diam ut venenatis. Et ligula ullamcorper malesuada proin libero nunc consequat interdum. Vitae nunc sed velit dignissim sodales. Natoque penatibus et magnis dis parturient. Massa placerat duis ultricies lacus sed turpis tincidunt id aliquet. Non enim praesent elementum facilisis leo vel. Adipiscing vitae proin sagittis nisl. Nisi scelerisque eu ultrices vitae auctor eu augue ut.
- First item bullet list.
- Second item bullet list.
- Third item bullet list.
Lorem ipsum dolor sit amet, consectetur adipiscing elit, sed do eiusmod tempor incididunt ut labore et dolore magna aliqua. Consequat mauris nunc congue nisi vitae suscipit tellus mauris a. Morbi tempus iaculis urna id volutpat lacus laoreet non curabitur.
DokuWiki Syntax using <WRAP labeled-image-large>:
<WRAP labeled-image-large>

<figure>

{{waterfall-540.png}}

<caption>This text is the caption [...] </caption>

</figure>

<WRAP>

Lorem ipsum dolor sit amet, consectetur adipiscing elit,
sed do eiusmod tempor incididunt ut labore et dolore
[...]
facilisis leo vel. Adipiscing vitae proin sagittis nisl.
Nisi scelerisque eu ultrices vitae auctor eu augue ut.

  * First item bullet list.
  * Second item bullet list.
  * Third item bullet list.

Lorem ipsum dolor sit amet, [...]

</WRAP>
</WRAP>
The above example uses an image with a medium size (540 pixels wide). The special syntax “labeled-image-…” will only scale the image to the correct size if it is larger. If the image is smaller, you can stretch it using DokuWiki's default image resizing markup, as in the following example.
Example: Image stretched with DokuWiki markup
(Change the size of the browser window, especially towards portrait.)
Lorem ipsum dolor sit amet, consectetur adipiscing elit, sed do eiusmod tempor incididunt ut labore et dolore magna aliqua. Consequat mauris nunc congue nisi vitae suscipit tellus mauris a. Morbi tempus iaculis urna id volutpat lacus laoreet non curabitur. Mi eget mauris pharetra et ultrices neque ornare. Tellus id interdum velit laoreet. Quis eleifend quam adipiscing vitae proin sagittis nisl rhoncus mattis. Lorem mollis aliquam ut porttitor. Proin nibh nisl condimentum id venenatis a condimentum vitae. Felis imperdiet proin fermentum leo. Semper quis lectus nulla at volutpat diam ut venenatis. Et ligula ullamcorper malesuada proin libero nunc consequat interdum. Vitae nunc sed velit dignissim sodales. Natoque penatibus et magnis dis parturient. Massa placerat duis ultricies lacus sed turpis tincidunt id aliquet. Non enim praesent elementum facilisis leo vel. Adipiscing vitae proin sagittis nisl. Nisi scelerisque eu ultrices vitae auctor eu augue ut.
- First item bullet list.
- Second item bullet list.
- Third item bullet list.
Lorem ipsum dolor sit amet, consectetur adipiscing elit, sed do eiusmod tempor incididunt ut labore et dolore magna aliqua. Consequat mauris nunc congue nisi vitae suscipit tellus mauris a. Morbi tempus iaculis urna id volutpat lacus laoreet non curabitur.
DokuWiki Syntax for a proportionally stretched image "{{image.png?720}}":
<WRAP labeled-image-large>

<figure>

{{waterfall-540.png?720}}

<caption>This text is the caption [...] </caption>

</figure>

<WRAP>

Lorem ipsum dolor sit amet, consectetur adipiscing elit,
sed do eiusmod tempor incididunt ut labore et dolore
[...]
facilisis leo vel. Adipiscing vitae proin sagittis nisl.
Nisi scelerisque eu ultrices vitae auctor eu augue ut.

  * First item bullet list.
  * Second item bullet list.
  * Third item bullet list.

Lorem ipsum dolor sit amet, [...]

</WRAP>
</WRAP>
Images with full width (1080 pixels)
Example:
(Change the size of the browser window, especially towards portrait.)
Lorem ipsum dolor sit amet, consectetur adipiscing elit, sed do eiusmod tempor incididunt ut labore et dolore magna aliqua. Consequat mauris nunc congue nisi vitae suscipit tellus mauris a. Morbi tempus iaculis urna id volutpat lacus laoreet non curabitur. Mi eget mauris pharetra et ultrices neque ornare. Tellus id interdum velit laoreet. Quis eleifend quam adipiscing vitae proin sagittis nisl rhoncus mattis. Lorem mollis aliquam ut porttitor. Proin nibh nisl condimentum id venenatis a condimentum vitae. Felis imperdiet proin fermentum leo. Semper quis lectus nulla at volutpat diam ut venenatis. Et ligula ullamcorper malesuada proin libero nunc consequat interdum. Vitae nunc sed velit dignissim sodales. Natoque penatibus et magnis dis parturient. Massa placerat duis ultricies lacus sed turpis tincidunt id aliquet. Non enim praesent elementum facilisis leo vel. Adipiscing vitae proin sagittis nisl. Nisi scelerisque eu ultrices vitae auctor eu augue ut.
- First item bullet list.
- Second item bullet list.
- Third item bullet list.
Lorem ipsum dolor sit amet, consectetur adipiscing elit, sed do eiusmod tempor incididunt ut labore et dolore magna aliqua. Consequat mauris nunc congue nisi vitae suscipit tellus mauris a. Morbi tempus iaculis urna id volutpat lacus laoreet non curabitur.
DokuWiki Syntax using <WRAP labeled-image-full>:
<WRAP labeled-image-full>

<figure>

{{waterfall-540.png}}

<caption>This text is the caption [...] </caption>

</figure>

<WRAP>

Lorem ipsum dolor sit amet, consectetur adipiscing elit,
sed do eiusmod tempor incididunt ut labore et dolore
[...]
facilisis leo vel. Adipiscing vitae proin sagittis nisl.
Nisi scelerisque eu ultrices vitae auctor eu augue ut.

  * First item bullet list.
  * Second item bullet list.
  * Third item bullet list.

Lorem ipsum dolor sit amet, [...]

</WRAP>
</WRAP>
The above example uses an image with a medium size (540 pixels wide). The special syntax “labeled-image-…” will only scale the image to the correct size if it is larger. If the image is smaller, you can stretch it using DokuWiki's default image resizing markup, as in the following example.
Example: Image stretched with DokuWiki markup
(Change the size of the browser window, especially towards portrait.)
Lorem ipsum dolor sit amet, consectetur adipiscing elit, sed do eiusmod tempor incididunt ut labore et dolore magna aliqua. Consequat mauris nunc congue nisi vitae suscipit tellus mauris a. Morbi tempus iaculis urna id volutpat lacus laoreet non curabitur. Mi eget mauris pharetra et ultrices neque ornare. Tellus id interdum velit laoreet. Quis eleifend quam adipiscing vitae proin sagittis nisl rhoncus mattis. Lorem mollis aliquam ut porttitor. Proin nibh nisl condimentum id venenatis a condimentum vitae. Felis imperdiet proin fermentum leo. Semper quis lectus nulla at volutpat diam ut venenatis. Et ligula ullamcorper malesuada proin libero nunc consequat interdum. Vitae nunc sed velit dignissim sodales. Natoque penatibus et magnis dis parturient. Massa placerat duis ultricies lacus sed turpis tincidunt id aliquet. Non enim praesent elementum facilisis leo vel. Adipiscing vitae proin sagittis nisl. Nisi scelerisque eu ultrices vitae auctor eu augue ut.
- First item bullet list.
- Second item bullet list.
- Third item bullet list.
Lorem ipsum dolor sit amet, consectetur adipiscing elit, sed do eiusmod tempor incididunt ut labore et dolore magna aliqua. Consequat mauris nunc congue nisi vitae suscipit tellus mauris a. Morbi tempus iaculis urna id volutpat lacus laoreet non curabitur.
DokuWiki Syntax for a proportionally stretched image "{{image.png?1080}}":
<WRAP labeled-image-large>

<figure>

{{waterfall-540.png?1080}}

<caption>This text is the caption [...] </caption>

</figure>

<WRAP>

Lorem ipsum dolor sit amet, consectetur adipiscing elit,
sed do eiusmod tempor incididunt ut labore et dolore
[...]
facilisis leo vel. Adipiscing vitae proin sagittis nisl.
Nisi scelerisque eu ultrices vitae auctor eu augue ut.

  * First item bullet list.
  * Second item bullet list.
  * Third item bullet list.

Lorem ipsum dolor sit amet, [...]

</WRAP>
</WRAP>
Bordered text blocks inside the label section
With the wrap syntax described here, the caption area of an image is bordered by default. You can change two things about it:
- Add a border to individual text blocks within the label section with
<WRAP border>. - Hide the border around the entire label section with
<WRAP no-border>.
Here is an example:
(Change the size of the browser window, especially towards portrait.)
Lorem ipsum dolor sit amet, consectetur adipiscing elit, sed do eiusmod tempor incididunt ut labore et dolore magna aliqua. Consequat mauris nunc congue nisi vitae suscipit tellus mauris.
Morbi tempus iaculis urna id volutpat lacus laoreet non curabitur. Mi eget mauris pharetra et ultrices neque ornare. Tellus id interdum velit laoreet. Quis eleifend quam adipiscing vitae proin sagittis nisl rhoncus mattis. Lorem mollis aliquam ut porttitor. Proin nibh nisl condimentum id venenatis a condimentum vitae. Felis imperdiet proin fermentum leo. Semper quis lectus nulla at volutpat diam ut venenatis. Et ligula ullamcorper malesuada proin libero nunc consequat interdum. Vitae nunc sed velit dignissim sodales. Natoque penatibus et magnis dis parturient. Massa placerat duis ultricies lacus sed turpis tincidunt id aliquet. Non enim praesent elementum facilisis leo vel. Adipiscing vitae proin sagittis nisl. Nisi scelerisque eu ultrices vitae auctor eu augue ut.
- First item bullet list.
- Second item bullet list.
- Third item bullet list.
Lorem ipsum dolor sit amet, consectetur adipiscing elit, sed do eiusmod tempor incididunt ut labore et dolore magna aliqua. Consequat mauris nunc congue nisi vitae suscipit tellus mauris.
Morbi tempus iaculis urna id volutpat lacus laoreet non curabitur.
DokuWiki Syntax using <WRAP no-border> and <WRAP border>:
<WRAP labeled-image-large>

<figure>

{{waterfall-540.png}}

<caption>This text is the caption [...] </caption>

</figure>

<WRAP no-border>

<WRAP border>
Lorem ipsum dolor sit amet, consectetur adipiscing elit,
sed do eiusmod tempor incididunt ut labore et dolore
[...]
</WRAP>

<WRAP border>
facilisis leo vel. Adipiscing vitae proin sagittis nisl.
Nisi scelerisque eu ultrices vitae auctor eu augue ut.
</WRAP>

<WRAP border>
  * First item bullet list.
  * Second item bullet list.
  * Third item bullet list.
</WRAP>

<WRAP border>
Lorem ipsum dolor sit amet, [...]
</WRAP>

</WRAP>
</WRAP>
Images with graphic markings
To describe the content of an image, it can be helpful to place markers directly in the image. There are two ways to achieve this:
- Outside of Zendiwiki, before uploading: Add markers directly to the image file using image editing software.
- Directly on Zendiwiki pages: Use the draw.io plugin for “live editing” on the page.
Since the first option depends on your individual image processing and preferred tools, it is not covered here.
Circled numbers lists
Zendiwiki provides a custom wrap plugin snippet to facilitate number markers in images: The circled number list. The plugin replaces the simple numbers in a numbered list with circled numbers. This makes it easier to reference corresponding markers on an image.
Example:
- Wake up.
- Drink coffee.
- Get up
- Drink more coffee.
- Go to work.
- Drink another coffee.
Custom DokuWiki Syntax using <WRAP circled-numbers-list>:
<WRAP circled-numbers-list>
  - Wake up.
  - Drink coffee.
  - Get up
  - Drink more coffee.
  - Go to work.
  - Drink another coffee.
</WRAP>
"Live editing" images on Zendiwiki pages
On Zendiwiki pages images with an edit option can be embedded. This is done with the following steps.
Step 1: Insert a markup snippet like the following at the point where the image is located on the page:
{{my-image.png}}
The image type must be png.
If there are no very special design requirements for the wiki page, then the recommendation is to use the following markups, if necessary in a slightly modified or adapted form.
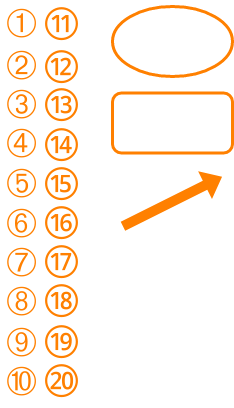
An easy way to use these markers is to import them into your draw.io scratchpad. The shapes are included in this import file: https://zendi.ph-weingarten.de/zendiwiki-drawio-image-markers.xml After saving the wiki page, the following clickable image is depicted:

Break it down:
drawio>creates an editable image on the Zendiwiki page.my_image.pngis the name of the PNG image to be created (not yet existing).
Step 2: Paste the image file into the editor and edit it.
If there are no very special design requirements for the wiki page, then the recommendation is to use the following markups, if necessary in a slightly modified or adapted form.
An easy way to use these markers is to import them into your draw.io scratchpad. The shapes are included in this import file: https://zendi.ph-weingarten.de/zendiwiki-drawio-image-markers.xml
Example:
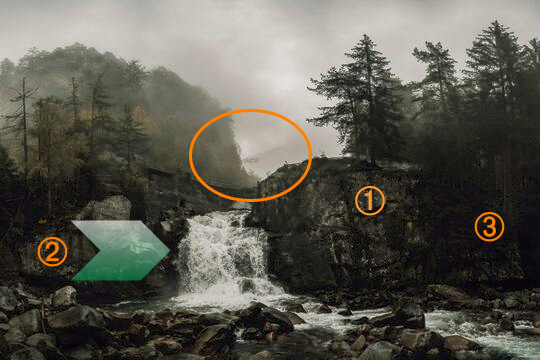
Lorem ipsum dolor sit amet.
- First item of the list.
- Second item of the list.
- Third item of the list.
DokuWiki Syntax:
<WRAP labeled-image-medium>

{{drawio>waterfall-540-editable.png}}

<WRAP>

Lorem ipsum dolor sit amet.

<WRAP circled-numbers-list>

  - First item of the list.
  - Second item of the list.
  - Third item of the list.

</WRAP>
</WRAP>
</WRAP>
Step 3: Remove the drawio> prefix so that the image can no longer be edited.
Side effect: A normal PNG image is displayed without any connection to drawio.
Example:

Lorem ipsum dolor sit amet.
- First item of the list.
- Second item of the list.
- Third item of the list.
DokuWiki Syntax:
<WRAP labeled-image-medium>

{{waterfall-540-editable.png}}

<WRAP>

Lorem ipsum dolor sit amet.

<WRAP circled-numbers-list>

  - First item of the list.
  - Second item of the list.
  - Third item of the list.

</WRAP>
</WRAP>
</WRAP>
— Initial author: M. Schäfer 2022/10/25