Manual of Style: Upload and Embed Images
Upload location and procedure
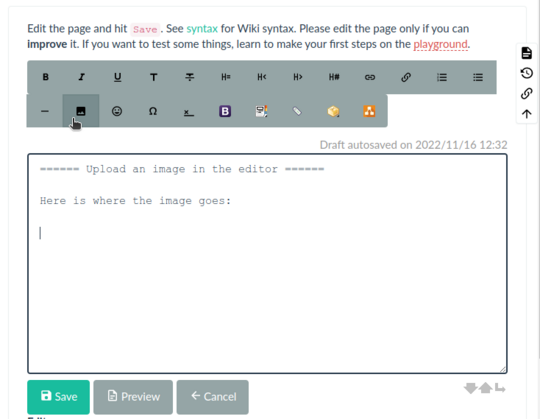
A simple and direct way to upload image files is directly from the wiki page editor. With this method, the media manager opens and offers the namespace of the currently edited page as the destination for the upload.
Always place your uploaded files in this default directory offered in the media manager, which belongs to the current namespace of the edited page.
Example:
Your wiki page introduction is located in a sub namespace all-my-books:non-fiction:
:all-my-books:non-fiction:introduction
If you launch the media manager from the editor while you are editing the page introduction, the default upload folder in the media manager is as follows:
:all-my-books:non-fiction
Step-by-step instructions (click on each step):
invisible dummy
Step 1: Open the media manager with the editor.
Step 2: Select the file(s) for upload.
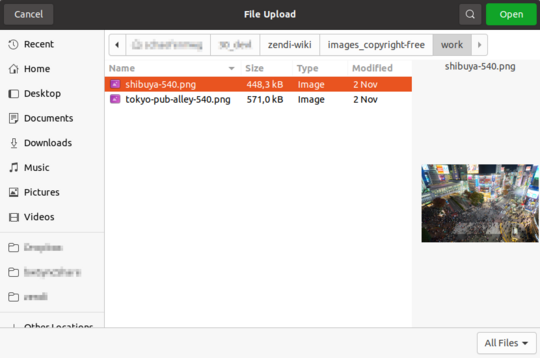
After clicking the Select files… button in the media manager (see the screenshot of step 3), the standard file selection dialog window of the browser opens. In the example the window is labeled File Upload.
This window looks slightly different on each operating system. However, the basic steps for file upload are always the same:
- Go to the directory on your computer that contains the image file(s).
- Select one or more files by marking them with a mouse click.
- You can also select multiple files. To do this, hold down the
<ctrl>key of your keyboard. - After making your selection, click on the
Openbutton. (In this example, on your computer the name may be different).
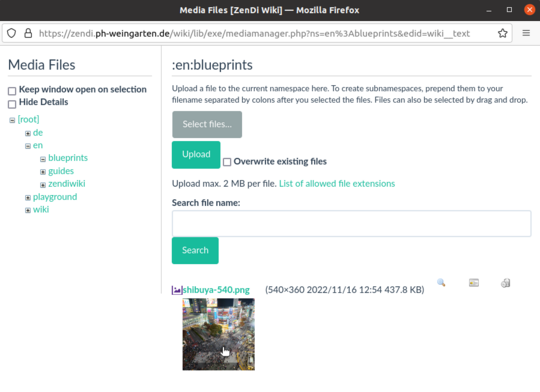
Step 3: Upload to the correct location.
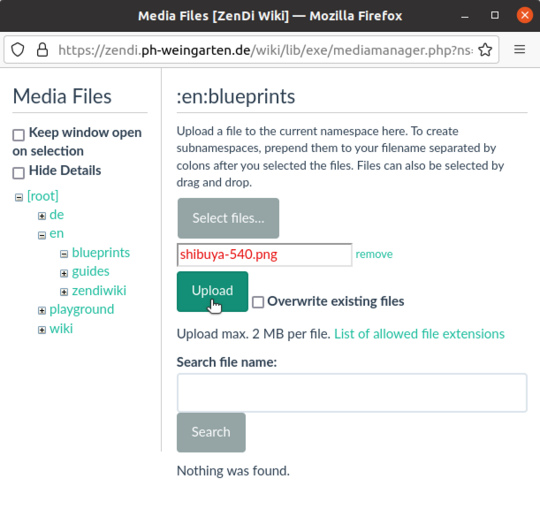
- Complete the upload by clicking the
Uploadbutton. - Make sure the upload location is correct. In this example, it is
:en:blueprintsas you can see in big letters above. - Normally you do not need to change the upload location provided. The media directory shall always match the namespace where the currently edited wiki page is located.
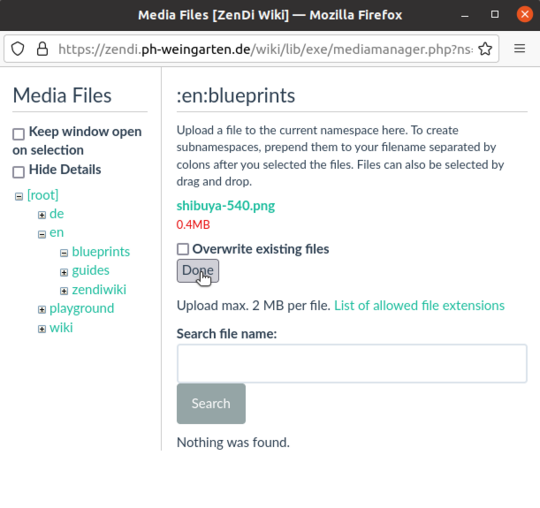
Step 4: Finish the upload.
Step 5: Select the uploaded image to insert.
Step 6: Adjust image settings.
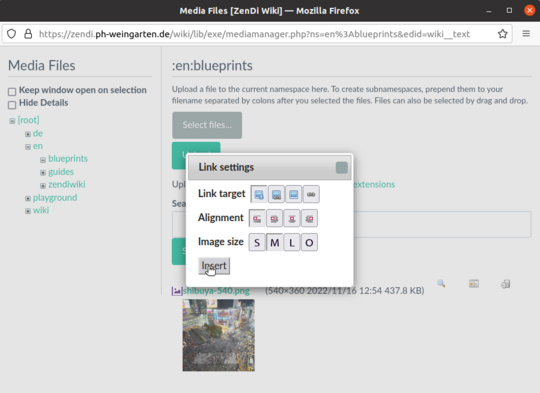
- After clicking on the image preview, a window will open where you can adjust some image or link settings.
- If your image has the correct size, as recommended, then you should select the
OunderImage size. What happens if you don't do that, you will see in the next step.
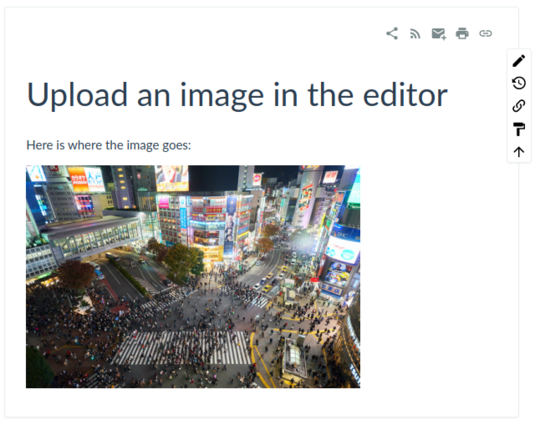
Step 7: Finish editing.
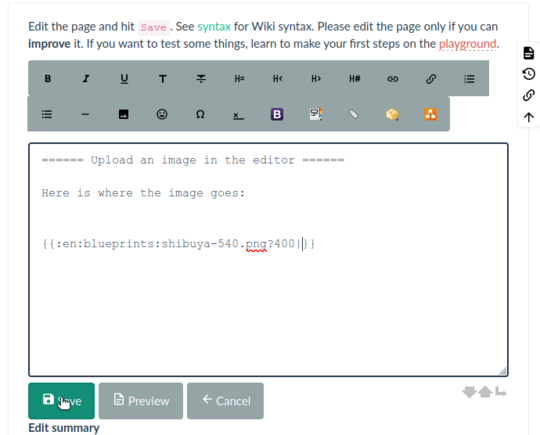
Finish editing the image link in the wiki text.
- In the example here, the resize parameter
?400should be removed. The image already has a recommended width of 540 pixels. - You should also add a title after the
|. This is displayed as a tooltip when the mouse pointer is moved over the image.
Embedding images
Images can be embedded in DokuWiki text as other media. For details see Image and Media Handling on the DokuWiki website. Images used in Zendiwiki articles should not normally be right or left aligned (see Zendiwiki: Manual of Style § Images). Reasonable exceptions are, of course, fine.
Lorem ipsum dolor sit amet, consectetur adipiscing elit, sed do eiusmod tempor incididunt ut labore et dolore magna aliqua. Consequat mauris nunc congue nisi vitae suscipit tellus mauris a. Morbi tempus iaculis urna id volutpat lacus laoreet non curabitur. Mi eget mauris pharetra et ultrices neque ornare. Tellus id interdum velit laoreet. Quis eleifend quam adipiscing vitae proin sagittis nisl rhoncus mattis. Lorem mollis aliquam ut porttitor. Proin nibh nisl condimentum id venenatis a condimentum vitae. Felis imperdiet proin fermentum leo. Semper quis lectus nulla at volutpat diam ut venenatis. Et ligula ullamcorper malesuada proin libero nunc consequat interdum. Vitae nunc sed velit dignissim sodales. Natoque penatibus et magnis dis parturient. Massa placerat duis ultricies lacus sed turpis tincidunt id aliquet. Non enim praesent elementum facilisis leo vel. Adipiscing vitae proin sagittis nisl. Nisi scelerisque eu ultrices vitae auctor eu augue ut.
So do not use the DokuWiki syntax for left or right alignment of images: whitespaces on the left or the right side of the image markup. Don't do this:
{{ my-image.png}}
{{my-image.png }}
What you can or should do:
{{my-image.png}}
{{ my-image.png }}
(First line: no whitespaces, image left bound without floating text. Second line: whitespaces on both sides, image centered.)
